- I recommend you put the top down, this makes the
ventiation a little more bareable :). First pull up on the (bottom) back seat
cushion, just yank up on it and it'll come right out. Mine was stuck real good
from not having been pulled in a long time. When you pull it you the hard part
is pushing the center seat belts through the little hole in the cushion, just
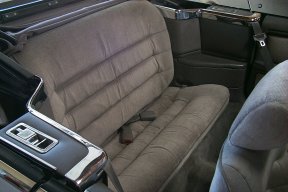
remember: somehow they got it in there, so it must come out! Once you have that
out put it aside out of the way. Here's what it looks like now:
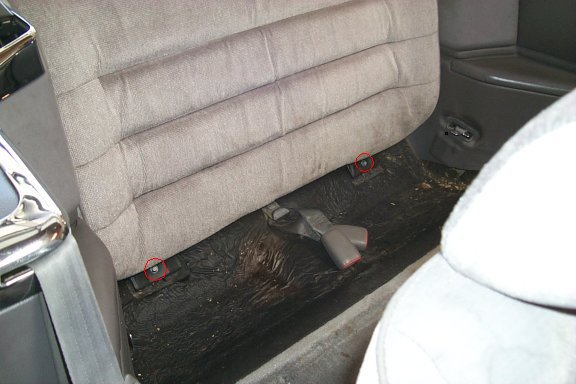
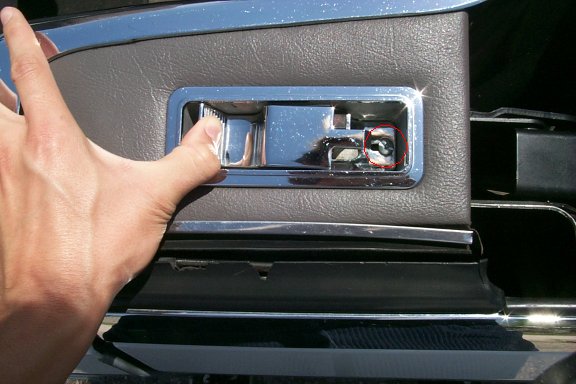
- There are two big screws holding the backing on, (circled in red)
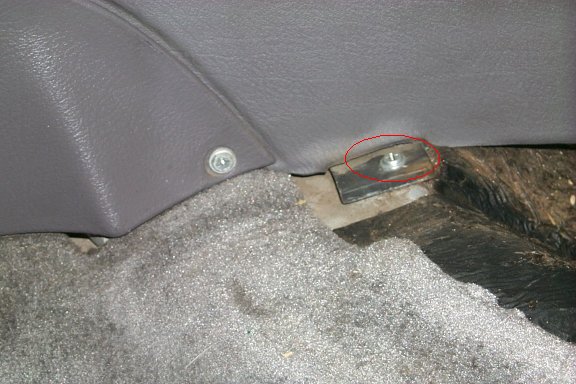
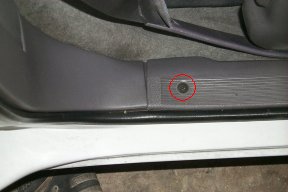
unscrew those. You can see them in the last picture. Then there are two screws
on either side connecting a little triangular plastic piece to the bottom of the
body (circled), unscrew them, here's the picture.
[NOTE: you don't need to unscrew the one
connecting plastic to plastic, just the other one.]
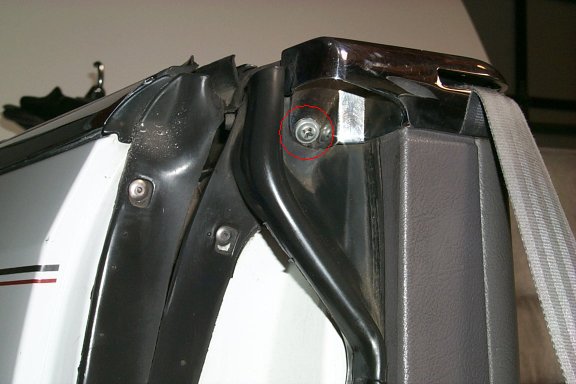
- Two more screws (one on either side) are located inside the door jamb at the
top (circled), just on the outside where the boot hooks in, they are recessed. See the
picture:
- Now where the boot hooks in there is one screw behind the latch (circled), pull them
down and like I am doing in the picture and unscrew them.
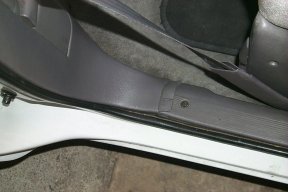
- On either side of the door jamb there is a screw that holds down the plastic
strip (circled). This also holds down the plastic piece that we unscrewed first. Unscrew
the last screw and pull up on the plastic while you force the other plastic piece
around and over the strip. See the following pictures for a much better
description:
-
Once all of that is done, the backing for the backseat should be loose.
You won't be able to take it completely out unless you unscrew or unsnap
the convertible top holder cover (when the top is halfway up/down).
[NOTE: if you do this with the cover, unplug the two drainage hoses from it
and doing this makes it a good time to check the quality, see bottom for
more information.]
and disconnect both rear speakers (assuming you have them) and unhook the
shoulder strap front seat belts. If you do all that you can take the
whole assmbly out of the car. This I did not do, it's hard to get the
shoulder straps out, but I did all the rest and after that you can pull
the back seat out significantly, see...
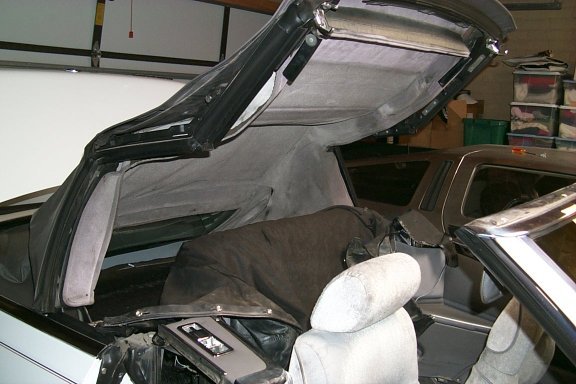
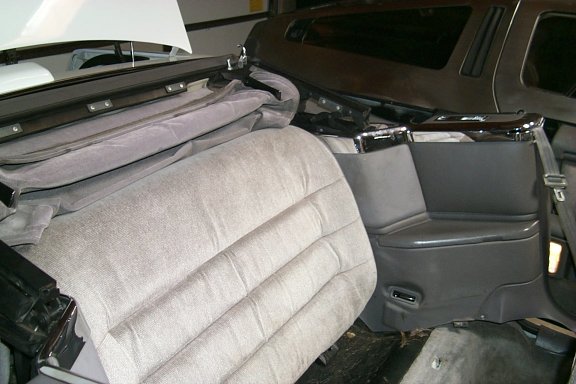
To slide the backseat out of the way, pull up on the boot hook part and
toward the center of the vehicle, this will make the side of the backseat
come forward and out of the way. One thing to note: before you slide it
forward you should push the rear safty belts through the holes, or they
will keep it from sliding. This is what it looks like if you don't pull
the cover out:
-
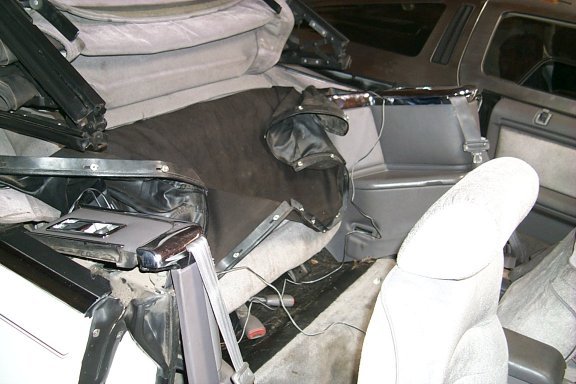
Once you have that pushed out of the way or completely out of the car,
this is what it looks like behind the backseat (before I vacuumed the hell
out of it):
Then, (if no one has had to work on the motor) there should be a big black
cover over the "motor hole", it is stuck on with adheasive, just pull that
thing off. It dampens road noise, keep it if you don't want it noisy.
Mine was gone from the driver's side when I went in there, it's still
there on my passenger's side and I can't tell the difference in
loudness from the passenger side to the drivers side. Sorry, I tried to
take some pictures of this but they didn't come out. The hole is pretty
big, probably like six inches by six inches. Now, see the next couple pictures:
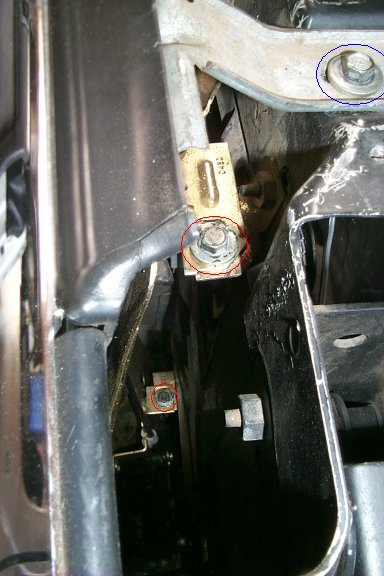
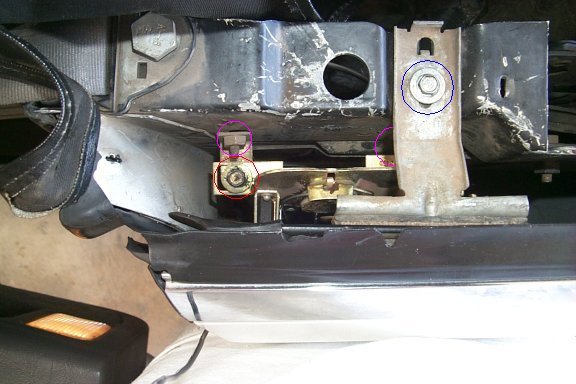
These are shots from the top of the window hole... there are a couple of ways to
take it from here, (thank you Harald) the object it to remove the window motor
assembly from the car so we can work on it. First unscrew the bolt
circled in blue it hold the felt thing on that pushes the window
out (so it doesn't rattle I guess). Now you can go one of two ways, choose which
ever sounds or looks easiest:
1. Unscrew the three red circled ones that hold the
window assembly (regulator and motor) to the body.
2. Unscrew the three pink circled (sorry I don't have
a better shot of these) that hold the window assembly to the body.
You see, the way I did it, I removed the window assembly alone without the three
brackets used to anchor the assembly to the frame. Harald told me that it may be
easier for some people to get at the bolts (also if you remove your entire back
seat). You can get at these from inside the vehicle.
-
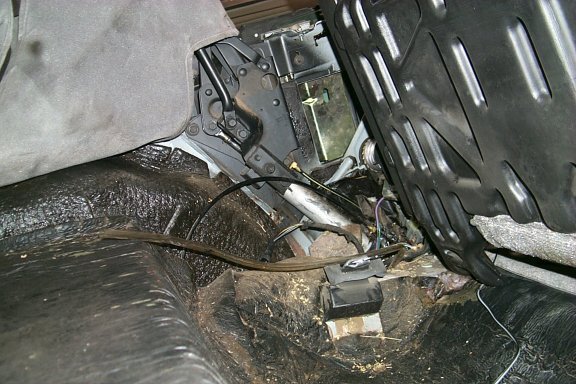
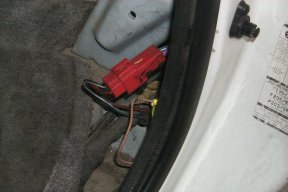
After that, unplug the electrical connector for the motor, it's towards the bottom.
You should be able to pull it out of the "hidden area" to get a better grip on it.
see the picture:
After you take off the screws and unplug the electrical connector, make
sure you put the window up before you take out the window mechanism
because if you don't you'll break the molding, like I did before I
figured that out. See the broken molding in the picture. DOH!
-
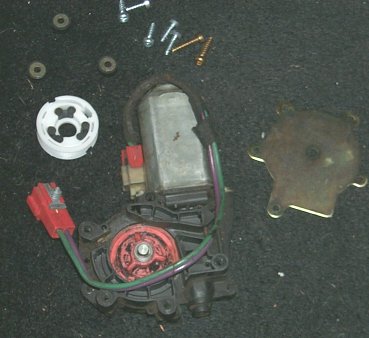
After you take out the window mechanism, which unfortunately I don't have
pictures for, all you have to do is swap the motor... it's pretty simple
actually. It just takes a long time to figure out what to do. Here is a
picture of my old motor (so you know what it looks like).
NOTE: When I got my new motor, the electrical connector was on the other
side of it, it's no big deal... the motor still spun the correct direction.
-
Installation is reverse of removal... well, not exactly but if you took it
apart, you should be able to put it back together.
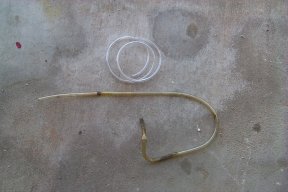
While having the backseat pushed forward, it's a good time to check the quality
of your drainage hoses. They could be the cause of your busted motor! I went
down to my local ACE Hardware store and bought new ones cause mine were all kinked
and had loads of dirt and debris in them. Here's a picture of the original vs. new
ones. Look how clear they are!
To replace them just pull out the old ones and feed the new ones into the same holes
the old ones came out of. There is a bezel on the hole, if you accidently pull it out
just stick it back in there, no biggie! This happened to one of mine.
|